Current & Recent Projects
Elgin Upright #205005 (ca 1905)

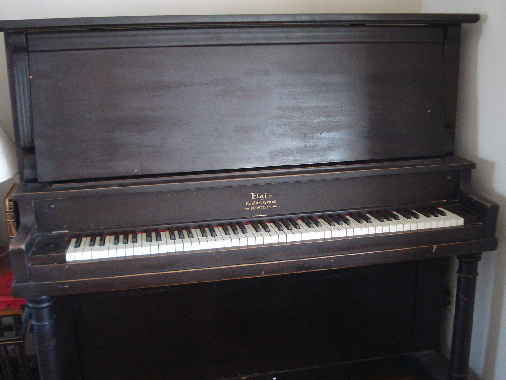
51" Elgin Upright #205005 (ca 1905)
Traditional Walnut Cabinet. Built about 1905. Reconditioned in March-April 2013 for the owner in St. Cloud, MN.
IMPROVEMENTS:
Recondition ActionInstall new hammers, shanks, butts, damper felts, backcheck felts, jack springs, underkey punchings. Tighten action screws, replace other defective parts.
Complete Cleaning--Clean strings, pressure bar, keybed, keypins, pedal mechanisms.
Complete RegulationAll adjustments to ensure that piano plays like new, tune to A-440.
 |
Action air cleaned |
|
 |
Rails removed |
|
 |
Damper levers removed |
|
 |
Wippens removed |
|
Selected pictures of the step-by-step improvement process
CLICK PICTURE FOR LARGER IMAGE, THEN CLICK "CLOSE" TO RETURN TO THIS PAGE
Original Manufacturer of this brand-name--J.O. Weaver: Ottawa and Elgin, Illinois.
Established--1901 by J.O. Weaver, 1907 by Emil P. Johnson,
Other brand-names used by this manufacturer--Curtice, Weaver, Seybold, E.P. Johnson
From: Pierce Piano Atlas, 12th Edition (2008, Larry Ashley Publisher, Albuquerque, NM).
Note: To obtain the age of your piano and details about the manufacturer, click: Pierce Piano Atlas--"the world's most authoritative publication on piano manufacturers, past and present." To learn how a piano works and how to go about buying one, we encourage you to purchase The Piano Book.
To see owner's "Letter of Recommendation," click REFERENCES
This is the "first phase" of a complete upright piano restoration, reviving the piano to reliable, efficient operation and vastly improving its musical tone. The owner will consider having us do the "second phase" in the future, which will include soundboard repairs and refinishing, complete restringing and repinning, and cabinet refinishing.
 |
Shank installation guide in place |
|
 |
Butts numbered |
|
 |
Odd-numbered used butts removed |
|
 |
Odd-numbered new butts installed |
|
 |
Broken hammer rail springs replaced |
|
 |
Install hammer rail felt |
|
 |
Glued jack springs drying |
|
 |
Glued backcheck felts drying |
|
 |
Reglue loose jack |
|
 |
Defective damper flange replaced |
|
 |
Damper block repaired |
|
 |
New damper block |
|
 |
Regulating rail re-installed |
|
 |
Spring rail & springs re-installed |
|
 |
Damper rod re-installed |
|
 |
Wippens re-installed |
|
 |
Shank bottom ends knurled |
|
 |
Odd-numbered shanks aligned |
|
 |
Front of shanks marked |
|
 |
Hammers dry-fitted at section ends |
|
 |
Shank tops cut |
|
 |
Alignment checked with old shanks |
|
 |
Odd-numbered shanks & hammers dry-fitted |
|
 |
Odd-numbered shanks glued & aligned |
|
 |
Checking heights |
|
 |
Odd-numbered hammers installed |
|
 |
Even-numbered hammers & butts removed |
|
 |
New even-humbered butts installed |
|
 |
Even-numbered shanks cut & installed |
|
 |
Even-numbered hammers glued |
|
 |
Even-numbered hammers drying |
|
 |
Striking-point guide attached |
|
 |
Travel paper inserted as needed |
|
 |
Hammers turned to correct travel |
|
 |
New bridle tapes installed |
|
 |
Backcheck wires regulated |
|
 |
Damper levers re-installed |
|
 |
New damper felts installed |
|
 |
Remove front panels and keys |
|
 |
Remove lower panel |
|
 |
Clean strings & pressure bar |
|
 |
Clean key pins |
|
 |
Disassemble pedal mechanisms |
|
 |
Clean, re-assemble, rebush, lubricate pedal mechanisms |
|
 |
Clean keys |
|
 |
Re-glue loose key fronts |
|
 |
Install bass damper felts |
|
 |
Regulate capstans and key heights for 6 notes in low bass |
|
 |
Regulate capstans and key heights for 6 notes in top treble |
|
 |
Regulate capstans and key heights of whites |
|
 |
Regulate capstans and key heights of sharps |
|
 |
Regulate key spacing and leveling |
|
 |
Regulate let-off |
|
 |
Regulate dip of white keys |
|
 |
Regulate dip of sharps |
|
 |
Regulate damper spoons |
|
 |
Tuning |
|
 |
Assemble cabinet |
|
 |
Keyboard and fallboard decal |
|
A - IN OUR SHOP
1. Dismantling and Cleaning the Action
2. Preparation for repairs
 |
Samples removed |
|
 |
Samples mailed to parts supplier |
|
 |
Temporary hammer rail installed |
|
 |
Strikeline guide prepared |
|
 |
Damper felts removed |
|
 |
Clean regulating rail |
|
 |
Clean & polish damper rod |
|
 |
Clean hammer spring rail |
|
 |
Remove backcheck felts & jack springs |
|
 |
Clean backcheck blocks & spring holes |
|
 |
Clean jack spring hole |
|
 |
Clean action screws |
|
3. Repairing defective parts
4. Installing New Parts: Butts, Shanks, Hammers
 |
Hammers numbered & arranged by odds & even |
|
 |
Gluing & aligning odd-numbered hammers |
|
|
Odd-numbered hammers installed |
|
 |
Correcting hammer angle |
|
5. Re-assembly and Adjustments
 |
Action reconditioning complete--front view |
|
 |
Action reconditioning complete--rear view |
|
B - AT THE PIANO OWNER'S HOME
1. Dismantle and Clean
2. Re-assembly, Regulation, and Tuning
For contact information, go to the "Home Page"